How to Set Up Order Limits
Order limit rules are created by configuring three elements: Title, Conditions, and Alert message.
📋 How to Create an Order Limit Rule
Section titled “📋 How to Create an Order Limit Rule”After installing the app, create and activate a rule to start limiting orders:
-
Access the Admin Dashboard
- Shopify Admin → Apps → GATE Checkout Rules
-
Create a New Rule
- Click the “Create New Rule” button
-
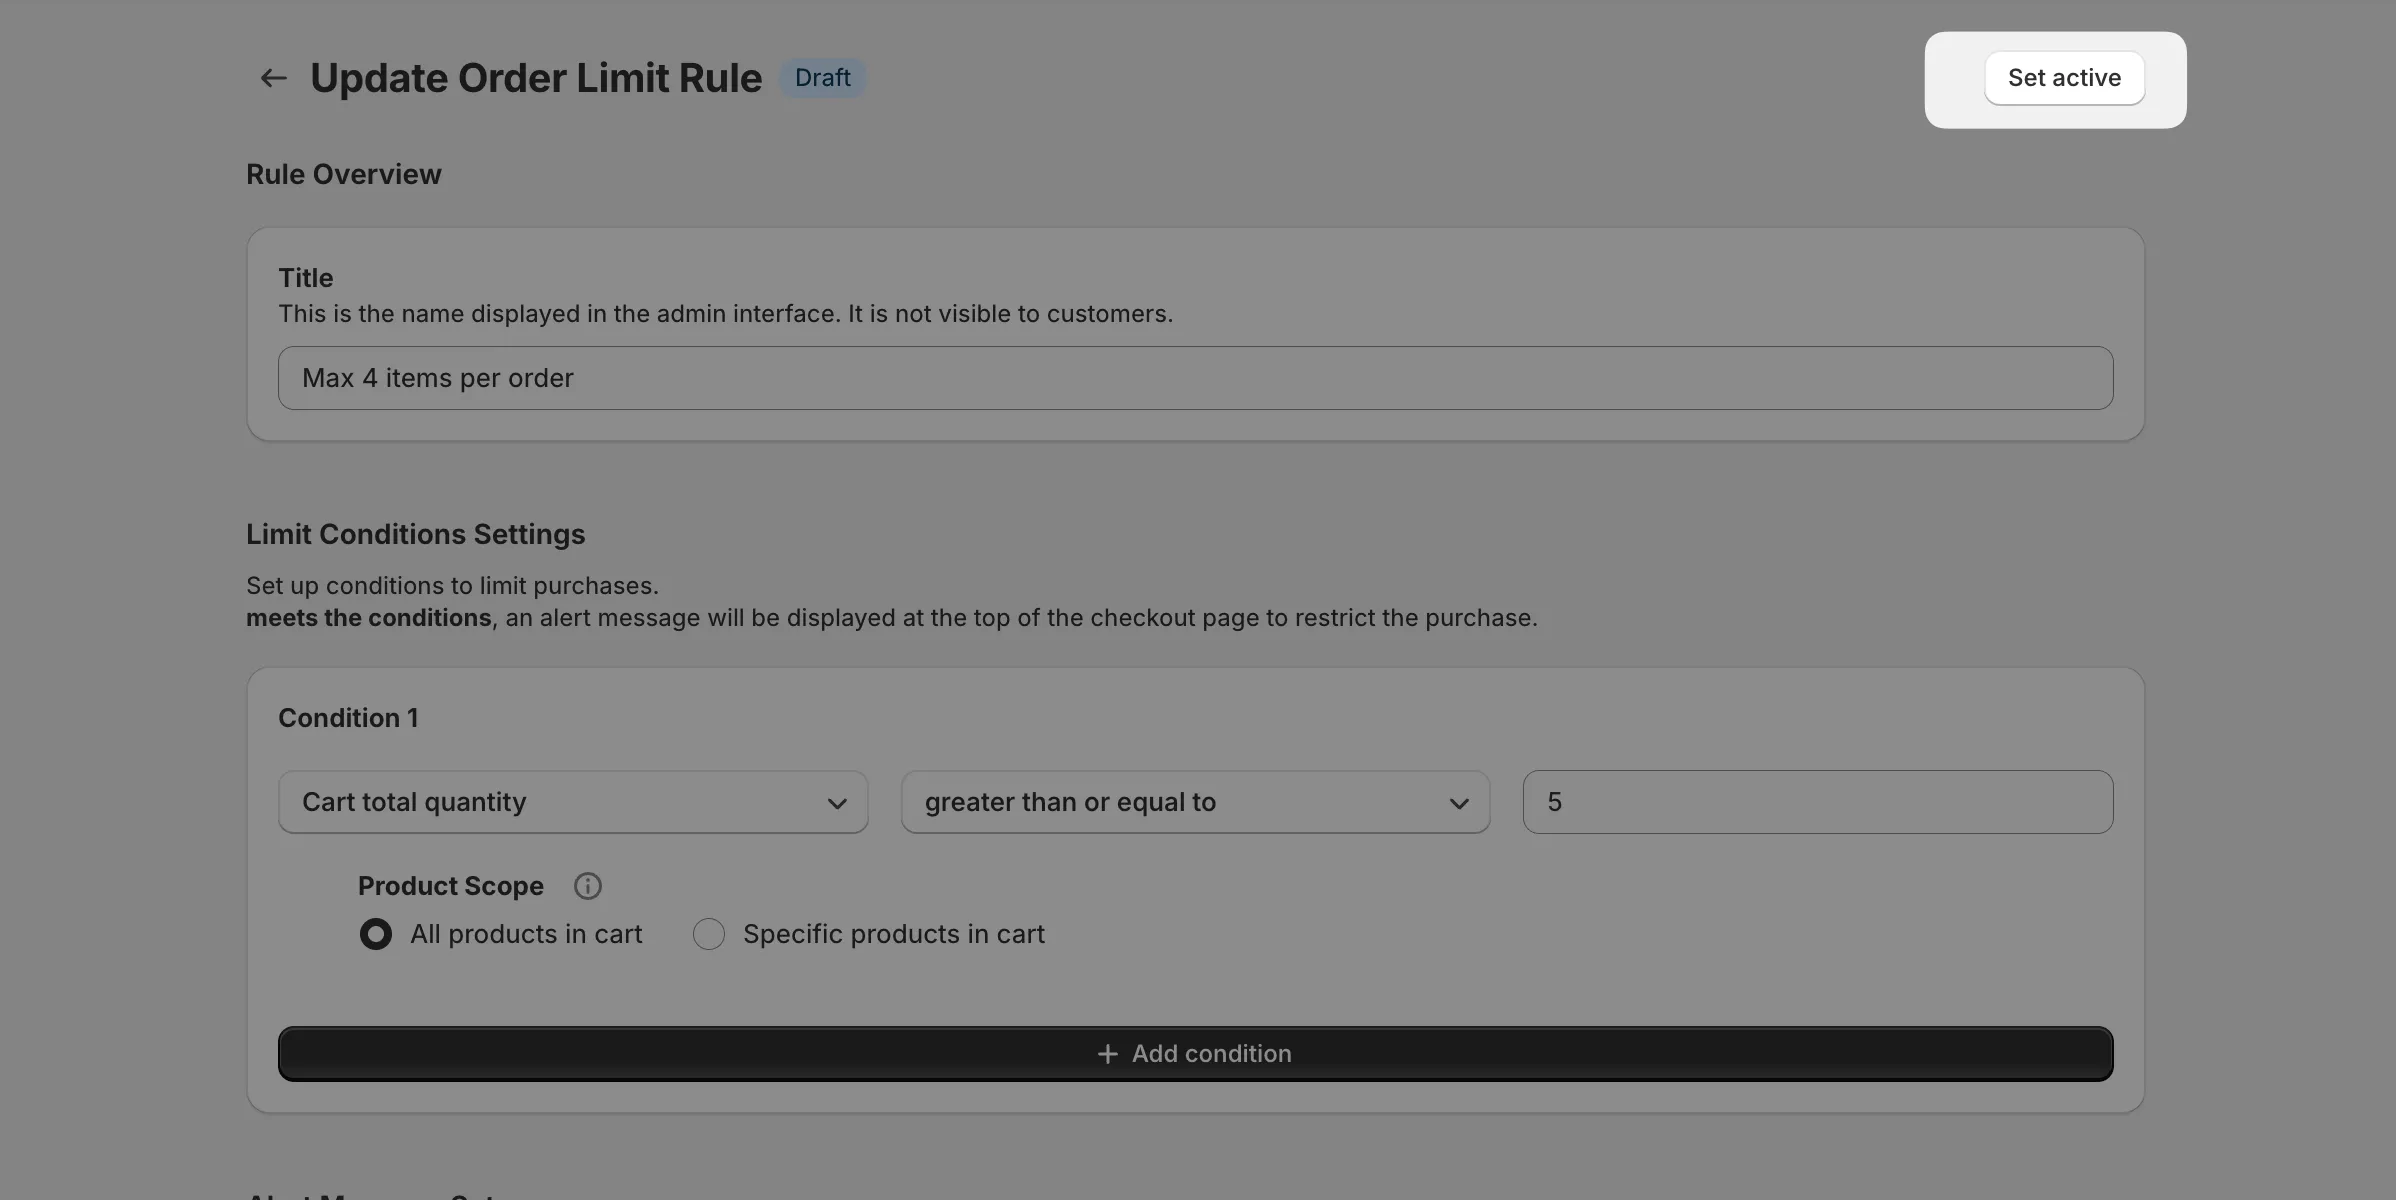
Configure the 3 elements
- Title (rule name)
- Conditions
- Alert message
-
Save the rule
-
Click the “Set active” button in the top right corner
Activating and Deactivating Rules
Section titled “Activating and Deactivating Rules”Control whether limits apply by toggling the rule’s state.
After creation, rules can be switched between “Active” or “Draft” states.
- Active: Order limits are applied
- Draft: Order limits are not applied; use for testing and review
You can activate a rule by clicking the “Set active” button in the top right corner.
Setting Conditions
Section titled “Setting Conditions”Configure when the rule applies. Checkout is limited when conditions are met.
From basic condition settings to complex combinations, various patterns are supported:
- Condition settings: Quantity limits, amount limits, customer limits, delivery destination limits
- Multiple conditions: Combine multiple conditions for advanced limits (Pro plan only)
- Product scope: Apply limits only to specific products
For detailed condition settings, see Condition Reference.
🔄 Next Steps
Section titled “🔄 Next Steps”- Condition Reference — Available conditions and how to set them
- Multiple Conditions Combination — Advanced condition settings
- Product Targeting — Specify targets for quantity/amount limits
- Recipe Collection — Practical configuration examples